My mom never came home from the palengke empty-handed. Almost every weekend there was puto in the bag, sometimes still warm, sometimes cooled down on the ride home, but always soft.
Making it the traditional way is another story. Soaking rice overnight, grinding it into galapong, waiting on the fermentation to do its work. That is a weekend project, not something you start because you want puto in the afternoon.
So this is the version I make at home now. This puto recipe skips the rice entirely and uses all-purpose flour, which means I can decide I want puto at three and have it on the table by three-twenty.
It does come out lighter than the palengke kind. Less dense, a little more cake-like. After making it this way for a while, that's the texture I reach for.
One batch makes 10 in a single bamboo steamer basket, so nothing sits around waiting for a second round. Cheese goes on at the very end.
Serve it the way it's usually served, next to Filipino dinuguan, or put it out for merienda with something like royal bibingka.

Save This Recipe 💌
Jump to:
- Why You’ll Love This Recipe
- What is Puto
- Ingredients You'll Need
- Substitutions and Additions
- Equipment
- How to Make Filipino Puto
- Rose's Top Tips
- Troubleshooting
- Variations
- What to Serve With This
- Storing and Reheating
- Recipe FAQs
- More Filipino Breakfast Recipes
- Did you try this recipe?
- Filipino Puto Recipe (Easy Cheese Puto)
Why You’ll Love This Recipe
- No rice soaking, no galapong. All-purpose flour goes straight into the bowl, so the batter is done in about five minutes instead of the night before.
- One batch, one steamer basket. Ten pieces fit in a single bamboo tier, so nothing sits around going cold while a second round steams.
- Lighter than the palengke kind. Wheat flour gives a softer, more cake-like crumb, which is easier to eat two or three of with coffee.
- The cheese goes on at the end. Two minutes before you pull the basket, so it melts into the top without sliding off or drying out.
What is Puto
Puto is a Filipino steamed rice cake, traditionally made from rice that's soaked overnight and ground into a slightly fermented dough called galapong. It falls under kakanin, the broader family of Filipino rice cakes that also includes kutsinta, biko, and suman.
You'll find it two ways. Sweet, as merienda with coffee, or savory, served alongside dinuguan or pancit. The cheese-topped version is the one most people picture now, and it's what most bakeries and palengke stalls sell.
This version uses all-purpose flour instead of rice, which is a common home adaptation and the reason it comes together in an afternoon.
Ingredients You'll Need

- All-Purpose Flour: Stands in for the soaked, ground rice in traditional puto. It gives a softer, more cake-like crumb, and it's the reason this comes together in an afternoon. Sift it. Lumps in the batter turn into dense pockets after steaming.
- Baking Powder: The only thing making these rise, so it has to be fresh. If yours has been open more than six months, test it before you commit a whole batch. Stale baking powder is the number one reason puto comes out flat.
- White Sugar: Keeps the sweetness clean and lets the cheese read savory against it. Brown sugar works but tints the crumb beige, which matters if you want the white puto look.
- Milk: Whole, 2%, non-fat, or evaporated all work. Evaporated gives the richest, milkiest flavor and the closest match to what you buy at the palengke. Non-fat steams up lighter and slightly drier.
- Whole Egg: Adds structure so the puto holds its dome instead of sinking as it cools. Skip it and you get a softer, more fragile cake that tears when you unmold it.
- Butter: Melted, for richness and moisture. It's also what keeps day-two puto from going dry and crumbly in the fridge.
- Vanilla: Rounds out the flour flavor. Wheat puto tastes flatter than rice puto without it, so this one isn't optional the way it might be elsewhere.
- Quick-Melt Cheese (Eden or similar): Melts into the top rather than sitting on it. Sharp cheddar holds its shape better if you want visible cheese, but it browns and goes oily under steam. American slices land in between.
See the recipe card for quantities.
Rice Flour vs All-Purpose Flour
Traditional puto starts with rice: soaked overnight, ground into galapong, left to ferment slightly. That fermentation is what gives palengke puto its faint tang and its particular chew. Rice flour is the shortcut version of that, and it still gets you close.
All-purpose flour is a different cake. Here's what actually changes.
Rice flour gives you a denser, slightly sticky crumb that pulls apart in strands. Closer to what you grew up eating if puto was a weekend thing in your house. It's also naturally gluten-free.
All-purpose flour gives you a softer, springier crumb with more lift and a cleaner bite. Lighter overall. It tastes more like a small steamed cake than a rice cake, and it's the version I make now because the flour is already in my pantry.
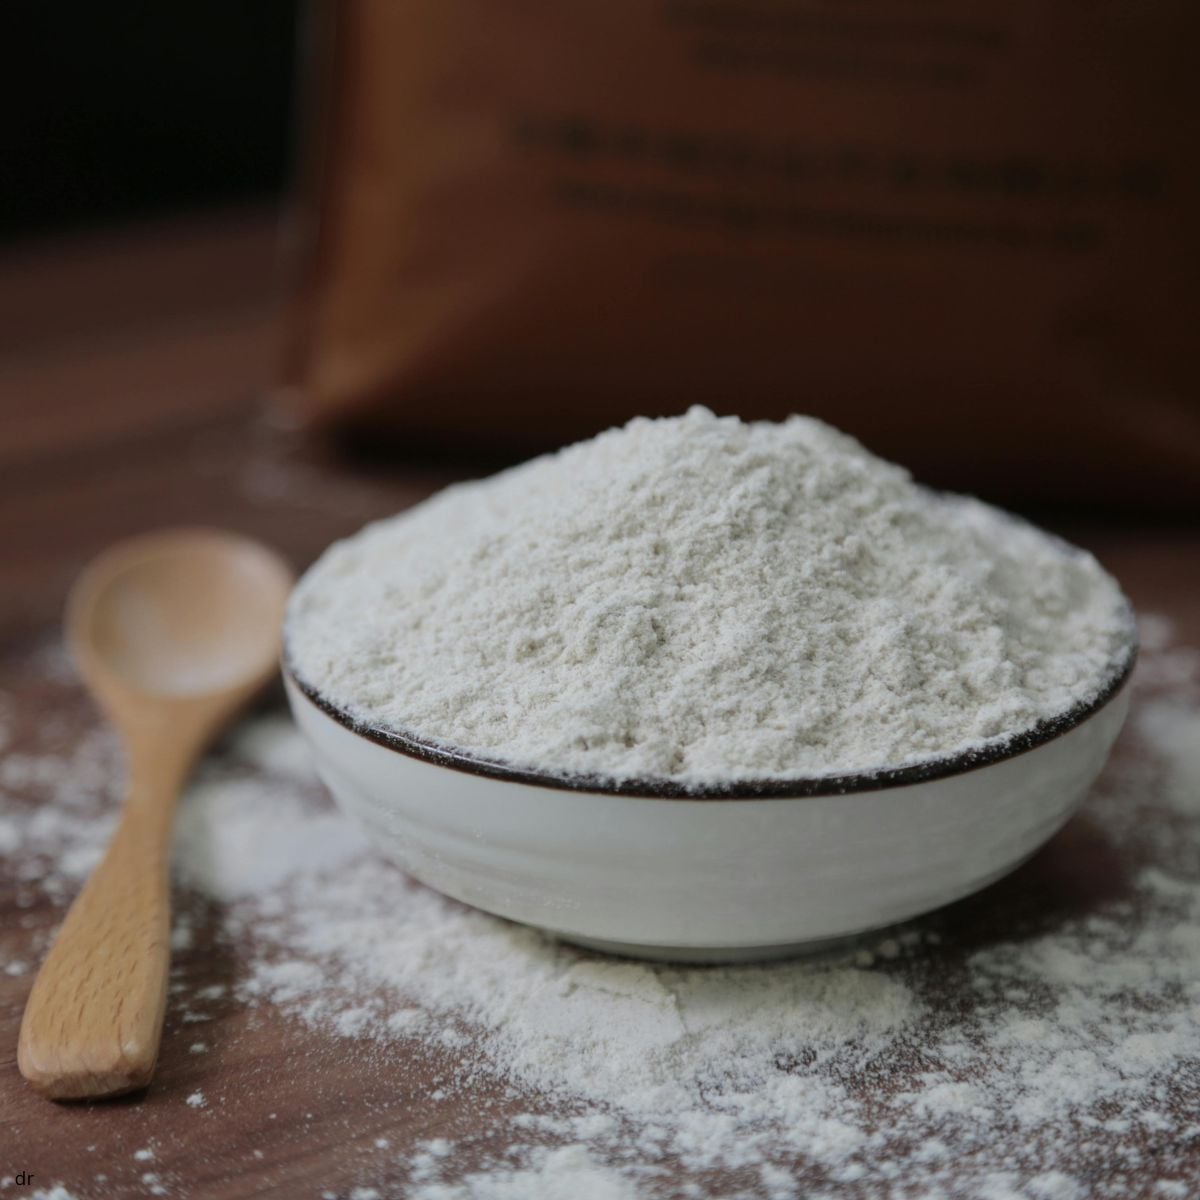
Neither one is the compromise. They're two textures, and which one you want depends on what you're after.
Can you swap them? Yes, 1:1 by volume in this recipe, but expect the batter to behave differently. Rice flour absorbs less liquid, so the batter runs thinner and settles fast. Whisk it again right before you fill each mold or the first puto will be dense and the last one will be soggy. Steam time stays about the same.
One thing not to do: don't reach for glutinous rice flour thinking it's the same aisle. It sets up chewy and gummy, closer to kutsinta or biko than puto.
Substitutions and Additions
- Brown Sugar: Deeper, slightly caramel flavor. It tints the crumb beige, so use it when you're not after the white puto look. Swap 1:1.
- Coconut Milk: Replaces the dairy milk for a richer, faintly sweet base. It also makes the puto denser, closer to the rice flour version even though you're still using wheat flour. Use full-fat, not the carton kind.
- Salted Egg: Sliced thin and pressed on before steaming, unlike the cheese, which goes on at the end. It needs the full steam time to set against the batter. Sharper and saltier than cheese against the sweet crumb.
- Ube or Pandan Extract: A teaspoon stirred into the batter. Start there and add more only after you've seen the color, since extract strength varies a lot between brands.
Equipment
Bamboo Steamer
Bamboo is the one piece of equipment that changes the result here. It absorbs the condensation that builds under the lid, so nothing drips onto the puto while it steams. Metal lids sweat, and those droplets land on the surface and leave it pitted and wet. A 10-inch basket sits neatly in a wok and holds all 10 molds in one layer.


No bamboo steamer? Wrap your metal lid in cheesecloth or katsa before you cover the pot. It soaks up the condensation the same way. Just make sure the cloth is pulled tight and tucked back over itself so no loose edge sags into the basket.
Puto Molds
Small heat-resistant cups, usually aluminum, silicone, or plastic. Mine measure 3 inches across the top and 2 inches at the base, which is what gives you 10 pieces from one batch.
Plastic is what I reach for because the batter releases without greasing. Aluminum and silicone both need a light brush of oil or melted butter first, or you'll be prying them out. Smaller molds work fine, you'll just get more of them and they'll steam faster.


Ice Cream Scoop
A portion scoop fills each mold evenly and keeps batter off the rims, which matters more than it sounds. Batter on the rim bakes onto the mold and makes unmolding harder.

How to Make Filipino Puto

- Mix the batter. Sift the all-purpose flour, sugar, and baking powder into a bowl and whisk to combine. Add the milk, egg, melted butter, and vanilla. Whisk until the batter is smooth and pourable with no lumps. Stop as soon as it comes together, since overmixing develops gluten and gives you dense puto instead of soft.

- Fill the molds. Lightly grease your puto molds if you're using aluminum or silicone. Plastic molds don't need it. Fill each one three-quarters full, which leaves room to rise and gives you 10 pieces at this size. An ice cream scoop keeps the portions even and the rims clean.

- Steam for 10 to 12 minutes. Bring the water in your wok or pot to a boil before the molds go in. Steam is what makes these rise, so a cold start gives you an uneven, lopsided lift. Set the bamboo basket over the boiling water, leaving space between molds so steam moves freely. Test with a toothpick.

- Add the cheese at the end. At 2 minutes from the finish, lift the lid and lay the cheese on top of each puto. Cover and finish steaming so it melts into the surface rather than sitting on it. Take the basket off the heat and let the molds sit for a minute or two. They release cleanly once they've firmed up. Serve warm.
Rose's Top Tips
- Sift the flour, don't skip it. Lumps don't dissolve in a batter this thin. They steam into dense pockets you'll only find once you bite in.
- Stop mixing the second it's smooth. Wheat flour builds gluten when you keep going, and gluten is what turns puto rubbery. Rice flour puto forgives overmixing. This one doesn't.
- Boil the water first, then hold it at a steady medium. A cold start means the puto sets before it rises. A hard rolling boil pushes them up unevenly and gives you lopsided tops.
- Wrap the lid if you're not using bamboo. Bamboo absorbs condensation on its own. Metal doesn't, and the droplets land on the puto and pit the surface. A layer of cheesecloth or katsa over the lid does the same job.
- Want the cracked top instead of the dome? Steam on high. The outside sets before the inside finishes rising, so it splits open. That's the palengke look, not a mistake.
- Give the molds room. Steam has to circulate around each one. Crowded molds cook unevenly, and the ones in the middle come out underdone.

Troubleshooting
- They came out flat. Almost always the baking powder. It loses strength once it's been open a while, and there's no other leavening in this recipe to cover for it. Test it before you commit a batch: drop a teaspoon into a few tablespoons of hot water. Active baking powder fizzes right away. If it barely reacts, replace it.
- They taste bitter or metallic. Too much baking powder, or it wasn't sifted in evenly so one mold got a concentrated pocket. Measure level, not heaping, and sift it with the flour rather than stirring it in after.
- The tops are wet and pitted. Condensation dripping off the lid. Bamboo absorbs it, metal doesn't. Wrap a metal lid in cheesecloth or katsa, and lift the lid straight up when you check them so nothing rolls off the edge onto the batter.
- They rose lopsided. Water at a hard rolling boil pushes steam up unevenly. Bring it to a boil to start, then drop to a steady medium and hold it there.
- They sank as they cooled. Usually underdone in the center. The toothpick test only tells you about the one you poked, so check the mold nearest the middle of the basket, not the edge. Crowded molds are the other cause, since the middle ones get the least circulation.
- They stuck to the molds. Aluminum and silicone both need a light grease. Plastic doesn't. If they're already stuck, let them cool another minute or two before trying again, since they firm up and release on their own.
- The cheese slid off or dried out. Added too early. Two minutes from the end is enough for quick-melt to fuse to the surface. Any longer and it separates and goes oily.
Variations
- Ube Puto: A teaspoon of ube extract in the batter, plus a little more if you want the color deeper. Start low, since extract strength swings a lot between brands and it's easy to overshoot into artificial.
- Pandan Puto: Same one teaspoon, pale green and grassier than ube. Pandan is more fragrant than sweet, so it reads lighter next to the cheese.
- Puto with Salted Egg: Sliced thin and pressed on before steaming, not at the end like cheese. It needs the full steam time to set against the batter. Saltier and sharper than cheese against the sweet crumb.
- Mini Puto: Same batter in mini molds. Cut the steam time to 6 to 8 minutes and check early, since they overcook fast at that size.
What to Serve With This
- Dinuguan: The classic pairing, and the reason puto shows up at so many Filipino gatherings. Rich, savory pork stew against a sweet steamed cake sounds odd until you've had it.
- Tocino: Sweet cured pork for a full Filipino breakfast. Puto takes the place of rice here.
- Chicken Longganisa: Garlicky and savory, same breakfast logic as tocino but sharper against the cheese.
- Coffee or hot chocolate: How most people actually eat puto, standing in the kitchen at three in the afternoon. Merienda, not a meal.
- Filipino Spaghetti: The other half of the birthday party table. Sweet sauce, sliced hot dogs, and cheese on top, served right next to a tray of puto.
Storing and Reheating
Let the puto cool completely before it goes into a container. Sealing them warm traps steam, and they turn sticky on the outside within a few hours.
Room temperature: Up to a day in an airtight container, and only if your kitchen is cool. Cheese-topped puto is better off in the fridge. Anything past a day, refrigerate.
Refrigerated: Up to 3 days. They firm up cold, which is normal. Don't judge the texture until you've reheated them.
Frozen: Up to 3 months. Cool completely, then freeze in a single layer on a tray before transferring to a bag or container. Freezing them stacked fuses them together.
To reheat: Steam for 2 to 3 minutes, or microwave for 20 to 30 seconds with a damp paper towel over them. The damp towel matters. Microwaving them dry turns puto tough and rubbery.
From frozen: Thaw overnight in the fridge, then reheat as above. You can also steam straight from frozen, closer to 5 minutes.
Recipe FAQs
Yes, 1:1 by volume. The texture changes: rice flour gives you a denser, slightly sticky crumb, closer to traditional puto, while all-purpose stays lighter and springier. Rice flour batter also runs thinner, so whisk it again before filling each mold. Don't substitute glutinous rice flour, which sets up gummy and chewy rather than soft.
Usually the baking powder has lost its strength. It's the only leavening in this recipe, so there's nothing to compensate. Test it by dropping a teaspoon into hot water. If it doesn't fizz right away, replace it. Overmixing the batter is the other common cause, since wheat flour builds gluten and turns the crumb dense.
Quick-melt cheese like Eden melts into the top rather than sitting on it. Sharp cheddar holds its shape better if you want visible cheese, but it browns and goes oily under steam. American slices land between the two.
They were most likely underdone in the center. Test the mold nearest the middle of the basket rather than one at the edge, since the middle gets the least steam circulation. Crowding the molds makes this worse.
Up to 2 days at room temperature, 3 days refrigerated, or 3 months frozen. Reheat by steaming for 2 to 3 minutes or microwaving for 20 to 30 seconds with a damp paper towel over them.
Yes. Steam them a day ahead, cool completely, and store in an airtight container. Reheat just before serving. They're better warm, so don't set them out cold.
More Filipino Breakfast Recipes
- Ginisang Corned Beef: Canned corned beef sautéed with onions and cabbage. Ten minutes, and it's the one most Filipino kitchens fall back on. Malunggay Pandesal: Soft rolls with malunggay worked into the dough. Same merienda slot as puto, different texture.
- Champorado: Chocolate rice porridge with five ingredients. Rainy morning food.
- Royal Bibingka: Baked rather than steamed, chewier than puto, closer to cornbread than cake.

Did you try this recipe?
Share how it turned out in the comment box below, and if you loved it, share it on Facebook, Pinterest & Instagram.
Thank you!


Filipino Puto Recipe (Easy Cheese Puto)
Equipment
- 1 wok for steaming water for bamboo steamer
- 1 bamboo steamer
- puto molds
- ice cream scooper optional
Ingredients
- 8 cups water (for steaming)
- 1 cup All purpose Flour
- 1 tablespoon Baking Powder
- ½ cup White Sugar
- ¾ cup Milk, (I used 2% milkfat) lukewarm
- 1 whole egg
- 1 tablespoon Unsalted butter melted
- 1 pinch salt
- 1 teaspoon vanilla essence
- 1 teaspoon pandan essence (optional)
- cheese slices quick-melt cheese or cheddar cheese
Instructions
- Fill a large steamer with water and bring it to a boil.8 cups water (for steaming)
- In a large bowl, combine the flour, sugar, salt and baking powder. Mix well to ensure the ingredients are evenly distributed.1 cup All purpose Flour, ½ cup White Sugar, 1 pinch salt, 1 tablespoon Baking Powder
- Add water or milk, butter, egg, vanilla and pandan essence (if using) until well combined.¾ cup Milk, (I used 2% milkfat), 1 whole egg, 1 tablespoon Unsalted butter, 1 teaspoon vanilla essence, 1 teaspoon pandan essence
- Stir the batter continuously until a smooth batter forms. Make sure there are no lumps.
- Using an ice cream scooper, pour the batter into the prepared puto molds, filling them about ¾ full to allow room for rising.
- Arrange the molds in the steamer, ensuring they are not touching. If not using bamboo steamer, cover the steamer with a clean kitchen towel before placing the lid to prevent water droplets from falling onto the puto.
- Steam the puto for about 10-12 minutes or until a toothpick inserted into the center comes out clean.
- If you would like to add cheese topping, 2 minutes before it is cooked, put your slice of cheese on each puto.cheese slices
- Carefully remove the puto from the steamer and let them cool slightly before removing them from the molds. Serve warm or at room temperature.
Save This Recipe 💌
Notes
- Always sift your flour for the lightest, fluffiest puto.
- Don't overmix the batter - stir just until combined to avoid a dense texture.
- Use quick-melt cheese for that perfect gooey topping.
- Steam over medium heat to avoid overcooking or making your puto too dense.
- If your molds differ from mine, lightly grease them with butter or oil to ensure easy puto removal.
- Add your cheese topping 2 minutes before the end of steaming for the perfect melt. Adding it too early can make it sink or spread thin.