I used to make dulce de leche the long way. Milk, sugar, vanilla, baking soda, salt, and a lot of standing at the stove stirring so the bottom wouldn't catch.
Now I use one ingredient and I'm not going back.
This Instant Pot dulce de leche starts and ends with a can of sweetened condensed milk. Pressure cooking does the browning for you, so there's no stirring, no scorching, and no guessing whether it's thick enough yet. Thirty minutes on high pressure gets you a thick, spreadable milk caramel. The only patience it asks for is the cooling time, and that part you can walk away from.

Save This Recipe ๐
Jump to:
- What Is Dulce de Leche?
- Why I Stopped Making It From Scratch
- Ingredient
- Equipment Needed
- How to Make Instant Pot Dulce de Leche
- How Long to Cook It
- Rose's Top Tips
- Troubleshooting
- No Instant Pot? Three Other Methods
- Variations
- How to Use Dulce de Leche
- Storage
- Safety
- Recipe FAQs
- More No-Bake Desserts
- Did you try this recipe?
- Instant Pot Dulce de Leche
What Is Dulce de Leche?
Dulce de leche is milk and sugar cooked slowly together until the sugars brown and the whole thing thickens into a spreadable milk caramel. The name is Spanish for sweet made of milk, which is about as literal as a name gets.
People mix it up with caramel constantly, and the difference is worth knowing before you make it. Caramel is sugar cooked on its own, so it tastes sharper and can turn bitter if you push it. Dulce de leche has the milk in there from the start, so it comes out rounder, milkier, and more forgiving.
Why I Stopped Making It From Scratch
The scratch version is milk, sugar, vanilla, baking soda, and salt, cooked down slowly while you stand there stirring so the bottom doesn't catch. It works. I made it that way for a long time. It also takes two to three hours of not leaving the kitchen, and the whole time you're guessing at when it's thick enough.
Now I use one can of sweetened condensed milk and I'm not going back.
Condensed milk is already milk and sugar cooked down, so most of that work is done for you before you open the can. The Instant Pot handles the rest. Pressure cooking runs hotter than a simmering pot, which speeds up the browning that gives dulce de leche its colour and its milky caramel flavour.
A slow cooker gets you there too, in about ten hours. This takes thirty minutes.
Ingredient
Here's what you'll need:
1 (14 oz) can sweetened condensed milk
That's the whole list, but the can you grab matters more than a one-ingredient recipe suggests.
It has to be sweetened condensed milk, not evaporated. Both come in the same size can and sit on the same shelf, which is how most people end up with the wrong one. Evaporated milk has no sugar in it, so there's nothing to caramelize and nothing to thicken. It will heat up and stay liquid.
Skip the reduced-fat and reduced-sugar versions too. The fat and sugar are what give you the thick, spoonable set once it cools. Pull those out and you get something looser and paler that never quite firms up.
Buy a solid sealed can, not a pull-tab. Pull-tab lids have a scored seam built to be opened by hand, and that's not a seam you want under pressure. If a pull-tab can is all your store has, pour the milk into a wide-mouth mason jar instead and cook that. Same result, and it cools faster so you can open it sooner.
Check the can before it goes in the pot. Dents and dings, especially along the seams, are a reason to pick a different one.

Equipment Needed
- Instant Pot or electric pressure cooker. A 6-quart fits one or two cans lying on their sides. An 8-quart fits more. Any model with a high pressure setting works.
- Trivet or steaming rack. Keeps the can off the bottom of the insert so water circulates all the way around it. Most Instant Pots come with one.
- Tongs or a jar lifter. The can comes out hot and wet. Tongs give you a grip without shaking it, which matters more than it sounds like it should.
- A whisk. Cooked dulce de leche often comes out of the can with a few lumps. Thirty seconds of whisking once it's cool smooths them out.
- A jar or airtight container. For whatever you don't eat standing at the counter.
How to Make Instant Pot Dulce de Leche
- Prep the can. Peel off the paper label and check the can over, especially along the seams. Dents, bulges, or a pull-tab lid mean grab a different can, or pour the milk into a wide-mouth mason jar and cook that instead.

- Set up the pot. Put the trivet in the bottom of the Instant Pot and lay the can on its side on top of it. On its side rather than upright so the water gets all the way around it and the milk browns evenly.
- Add the water. Fill until the can is completely covered, ideally with an inch or two over the top, and stay under the max fill line. The can has to stay submerged the entire time. Water above it is what keeps the temperature steady and controlled. An exposed can heats unevenly.
- Pressure cook 30 minutes on high. Seal the lid, set the valve to sealing, and set high pressure for 30 minutes. The pot takes 20 to 30 minutes to come to pressure before the timer starts, so don't panic when nothing happens for a while.
- Let it release naturally. Around 15 to 20 minutes. Skip the quick release here. The slow cooldown keeps the milk browning a little longer and gives you a deeper colour.
- Cool completely before opening. Leave the can in the water and walk away. This takes a few hours, and there's no shortcut. The contents are far hotter than boiling water and under pressure inside the can. Don't shake it, don't move it around, don't pry at it early.
- Whisk and store. Once it's fully at room temperature, open the can and whisk. A few lumps are normal and they smooth right out. Transfer to a jar.

How Long to Cook It
Thirty minutes is my default, but cook time is really a dial. The longer it runs, the darker and thicker it gets.
Shorter cook, around 15 to 20 minutes. Pourable and light gold. This is what you want for drizzling over ice cream or stirring into coffee, where a thick set would just sit there in a clump.
30 minutes. Spreadable and properly caramel-coloured. Thick enough to hold its shape on toast, loose enough to swirl into things. This is the one I make most.
Longer cook, around 40 to 45 minutes. Dark and firm. Use this when it needs to stay put: filling cookies, layering a cake, anything where a looser dulce de leche would run out the sides.
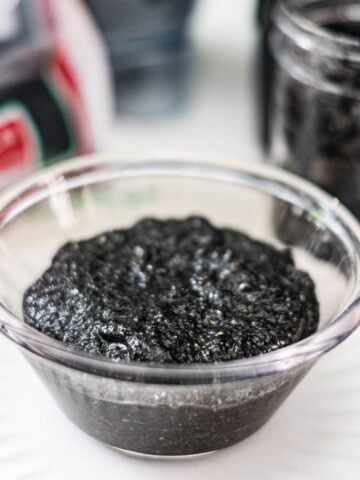
Judge by colour, not the clock. Cans vary, brands vary, and pots vary. What you're looking for is a deep golden brown, somewhere around the colour of peanut butter that's been left in the sun. Pale means it needs more time next batch. There's no fixing it after the fact, so err longer if you're unsure.
Natural release counts as cook time. It keeps browning on the way down, which is a good chunk of why quick release gives you a lighter result. Factor that in if you're aiming for the shorter end.
One thing to remember: it always looks thinner in the can than it will be in the jar. It firms up as it cools. Don't judge the texture until it's fully at room temperature, or you'll cook the next batch too long trying to fix a problem that wasn't there.
Rose's Top Tips
- Buy two cans. The pot is already running and the water is already hot, so a second can costs you nothing but the price of the can. An unopened cooked can keeps at room temperature for months, which means the next time you want dulce de leche it's already done.
- Lay the cans flat, not stacked. If you're doing more than one, they should sit side by side on the trivet with water moving between them. Stacked cans shield each other and the top one browns less than the bottom one.
- Don't rush the cooling, and don't move it. The contents are hotter than boiling water and still under pressure inside the can. Leave it in the water and leave it alone. This is the step people shortcut and it's the only genuinely risky part of the recipe.
- Lumps are normal. They're not a sign you did something wrong. The milk solids set unevenly against the can wall as it cools. Thirty seconds with a whisk and they're gone.
- Warm it before you use it as a drizzle. Straight from the fridge it's stiff enough to hold a spoon upright. A few seconds in the microwave or a jar sat in warm water loosens it back up without thinning it permanently.
- Label the can if you're stashing it. A cooked can looks exactly like an uncooked one once the paper is off, and there's no way to tell them apart without opening one. Write on it with a marker before it goes in the pantry.
Troubleshooting
- It's too thin. Most of the time it isn't. Dulce de leche looks alarmingly runny in the can and firms up a lot as it cools, so don't judge it until it's fully at room temperature. If it's still loose after that, it needed more time. You can't fix a finished batch, but you can pour it into a saucepan and cook it down gently over low heat if you're willing to stand there and stir. That's the thing this recipe exists to avoid, so mostly I just use it as a drizzle and add ten minutes next time.
- It's too thick to spread. That's the fridge, not the recipe. Cold dulce de leche sets hard. Let it sit out for twenty minutes, or warm the jar in a bowl of hot water. It loosens right back up.
- It's lumpy. Normal, and fixable. The milk solids set unevenly against the metal as it cools. Whisk it once it's at room temperature and the lumps break down in under a minute. If any survive, push it through a fine mesh sieve.
- It's pale. Undercooked. There's nothing to do to this batch except use it somewhere the colour doesn't matter, like stirred into coffee. Next time, go longer and let the pressure release naturally instead of quick releasing.
- It's grainy. Usually the can wasn't fully submerged, so part of it ran hotter than the rest and the sugars seized. Check your water level next time and make sure there's an inch or two over the top. A short blitz with an immersion blender will smooth out a grainy batch reasonably well.
- It never thickened at all. Check the can you used. Evaporated milk won't work, and reduced-fat or reduced-sugar condensed milk won't set properly either. This is the most common reason a batch fails outright, and it happens before the pot is even plugged in.
No Instant Pot? Three Other Methods
Same can, same result, different amounts of patience.
- Stovetop, about 3 hours. Peel the label, set the can on its side in a deep pot, and cover it with a few inches of water. Bring it to a boil, then drop it to a steady simmer for around three hours. The one job you have is keeping the can submerged, so check the water level every half hour and top it up with hot water from the kettle. Let the can cool in the water before opening. This is the method most people grew up with and it works, it just ties you to the kitchen.
- Slow cooker, about 8 to 10 hours on low. Can on its side, covered with a few inches of water, lid on, low, and walk away. Nothing to monitor because a slow cooker barely evaporates. The tradeoff is obvious: you start it in the morning for dessert that night. Good if you're already out of the house, useless if you decided at 4pm that you wanted dulce de leche.
- Oven water bath, about 1.5 to 2 hours. This one skips the can entirely. Pour the condensed milk into a pie dish or shallow baking dish, cover it tightly with foil, and set that inside a larger roasting pan. Pour hot water into the outer pan until it comes about an inch up the sides. Bake at 425ยฐF, checking every so often to top up the water, until it's the colour you want. Whisk it smooth at the end because it will have a skin and some lumps. This is the method to use if the sealed can makes you nervous, since nothing is under pressure at any point.
None of these are worse dulce de leche. They're the same reaction running slower. The Instant Pot just gets there in thirty minutes.
Variations
Everything here goes in after the dulce de leche has cooked and cooled. Nothing gets added to the can before it goes in the pot.
- Salted. A pinch of fine sea salt stirred into the whole batch. Salt doesn't make it less sweet, it just gives your palate something else to notice, which is why a salted batch is easier to eat by the spoonful. Start with a scant quarter teaspoon per can and taste before adding more, because you can't take it back out.
- Vanilla. Half a teaspoon of extract per can, stirred in while it's still slightly warm so it distributes without you having to work at it. This is the closest you'll get to the scratch version, where the vanilla cooks in from the start. Stirred in at the end it sits a little brighter and more forward rather than blending into the background.
- Cinnamon. A quarter teaspoon of ground cinnamon per can, added the same way. Warmer and rounder, and it plays well with anything apple. Start low, since cinnamon keeps developing in the jar over a day or two and what tastes mild tonight can dominate by Wednesday.
- Coffee. A teaspoon of instant espresso powder dissolved in a splash of hot water, then stirred through. The bitterness cuts the sweetness more effectively than salt does. Good for anything chocolate.
- Dairy-free. Swap the sweetened condensed milk for canned sweetened condensed coconut milk and cook it the same way. It sets a little softer and carries a coconut note, so use it where that's welcome rather than trying to hide it.
How to Use Dulce de Leche
- Spread it. Toast, pancakes, waffles, warm pandesal. It's thick enough at room temperature to stay where you put it, which is more than butter manages on a hot slice.
- Fill things with it. Between cake layers, sandwiched in cookies, piped into pastry. Use a longer-cooked, firmer batch for this. A loose one runs out the sides and turns your cookies into a situation.
- Drizzle it. Over ice cream, yogurt, sliced apples, banana. Warm it slightly first so it pours in a ribbon instead of landing in a lump. A shorter-cooked batch does this without any warming at all.
- Stir it into drinks. A spoonful in hot coffee dissolves into something closer to a caramel latte than sweetened coffee. Same in warm milk.
- Bake with it. Swap it in anywhere a recipe calls for caramel sauce or thick caramel filling. It's less sweet-sharp than sugar caramel and won't seize the way caramel can when it hits a batter.
- Eat it with a spoon. Standing at the fridge. I'm not going to pretend this isn't the most common one.
Storage
One 14 oz can makes roughly a cup and a quarter of dulce de leche.
Opened, in the fridge: transfer it to a clean airtight jar and it keeps for about two weeks. Don't store it in the can it cooked in. Once a can is open, the metal is in contact with air and the contents pick up a metallic edge over a few days.
Unopened, in the pantry: a cooked can that's never been opened keeps the way a regular can of condensed milk does. Peel the label before cooking and it comes out looking identical to an uncooked can, so write on it with a marker before it goes on the shelf.
In the freezer: up to three months in an airtight container. Leave a little headroom since it expands. Thaw it in the fridge overnight, then whisk, because freezing tends to make the texture grainy and a quick whisk brings it back.
Straight from the fridge it's stiff. Twenty minutes on the counter or a few minutes with the jar sitting in warm water and it's spreadable again. Don't microwave it hard, since overheating thins it permanently rather than just softening it.
Safety
Cooking a sealed can under pressure is safe when it's done right, and the rules are short. Here they are.
- The can stays under water the whole time. This is the one that matters most. Water above the can keeps the temperature capped and even. An exposed can can heat past that, and a can that heats past that is a can under real internal pressure.
- Inspect before it goes in. No dents, no bulges, no rust, especially along the seams. A compromised seam is the failure point. If a can looks off, use a different one.
- No pull-tab lids. That scored ring is designed to tear open by hand. It's the weakest part of the can and it isn't built for this.
- Let it cool completely, in the water, undisturbed. The contents come out hotter than boiling water and thick enough to stick to skin, which is a worse burn than hot water alone. Don't lift it out early, don't shake it, don't pry at the lid to check. A few hours, and there's no way around it.
- Don't open it warm. Even after the pot has depressurized, the can hasn't. Room temperature, all the way through, before a can opener touches it.
- If any of this makes you uneasy, don't do it. Pour the condensed milk into a wide-mouth mason jar with the lid finger-tight and cook that instead, or use the oven water bath method above. Both get you the same dulce de leche with nothing sealed and pressurized. There's no prize for doing it the way I do it.
Recipe FAQs
Caramel is sugar cooked on its own. Dulce de leche is milk and sugar browning together, so it comes out milkier, rounder, and less likely to turn bitter. They're not interchangeable in flavour, but dulce de leche will stand in for caramel sauce in most recipes.
No. Evaporated milk has no sugar in it, so there's nothing to caramelize and nothing to thicken. It comes in the same size can and sits on the same shelf, which is how the mix-up happens. Check the label for "sweetened condensed."
No. Scratch recipes use it to speed up browning, but you don't need it here.
Colour, not the clock. You're after a deep golden brown. Cans and pots vary enough that time alone won't tell you, and there's no fixing a pale batch after the fact, so lean longer if you're unsure.
A few hours, in the water, undisturbed. This is the part people want to skip and it's the only genuinely risky step. If you want it sooner, cook the milk in a mason jar instead of the can. It cools noticeably faster.
Yes. Lay them side by side on the trivet, not stacked, with water covering all of them and everything under the max fill line. Cook time doesn't change. Since the pot's already running, a second can costs you nothing.
Yes, if the can is undented, has no pull-tab lid, stays fully submerged, and cools completely before opening. If you'd rather not, use a wide-mouth mason jar or the oven water bath method instead.
Yes. Stovetop takes about 3 hours, a slow cooker 8 to 10 hours on low, and an oven water bath 1.5 to 2 hours. Full details are above.
Normal. The milk solids set unevenly against the can. Whisk it once it's at room temperature and they break down in about a minute.
More No-Bake Desserts

Did you try this recipe?
Share how it turned out in the comment box below, and if you loved it, share it on Facebook, Pinterest & Instagram.
Thank you!


Instant Pot Dulce de Leche
Equipment
- 1 Instant Pot
- Trivet
Ingredients
- 14 ounce can of sweetened condensed milk
Instructions
- Prepare the Can: Remove the label from the can of sweetened condensed milk. Ensure the can is undented and sealed properly.14 ounce can of sweetened condensed milk
- Set Up the Instant Pot: Place the trivet or steaming rack at the bottom of the Instant Pot. Position the can on its side on the trivet.
- Add Water: Fill the Instant Pot with water until the can is fully submerged, ensuring it does not exceed the maximum fill line.
- Pressure Cook: Seal the Instant Pot lid and set it to cook on high pressure for 30 minutes.
- Natural Release: Allow the pressure to release naturally. This may take approximately 15โ20 minutes.
- Cool Down: Once the pressure has fully released, carefully remove the can using tongs. Let it cool to room temperature before opening.