
Got leftover rice and no idea what to eat with it? This tuna sushi bake is one of my go-to recipes because I almost always have canned tuna in the pantry. It’s quick, easy, and always a hit with my kids. We eat it as a snack, a simple meal, or bring it to potlucks when I need something everyone will enjoy.
Save This Recipe 💌
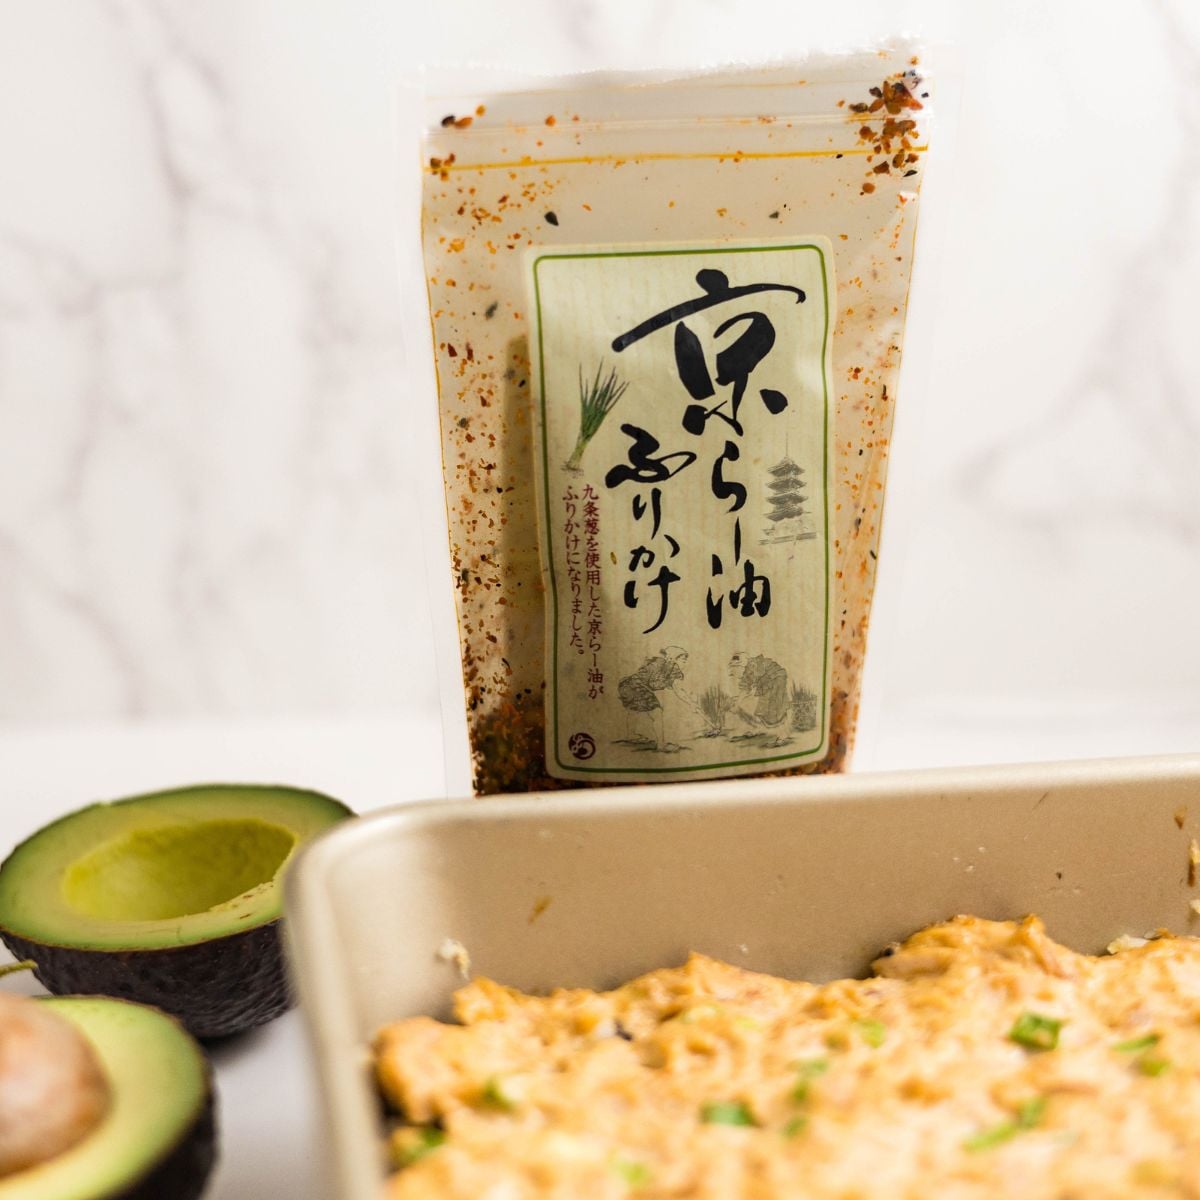
I really wanted to remake this because I've been obsessed with my Kyo Rayu chili oil furikake from Tokyo, it's dangerously addictive and makes this version taste like something from a very good restaurant. I gave some away and totally regret not buying more for myself. Any furikake you love works here, but if you ever see the Kyo Rayu version, buy more than you think you need.
If you love sushi bakes, my Crab & Sushi Bake is the other one we make on repeat.
Jump to:
What You'll Need
This is just an overview - jump down to the full recipe card for exact amounts.
Rice Base
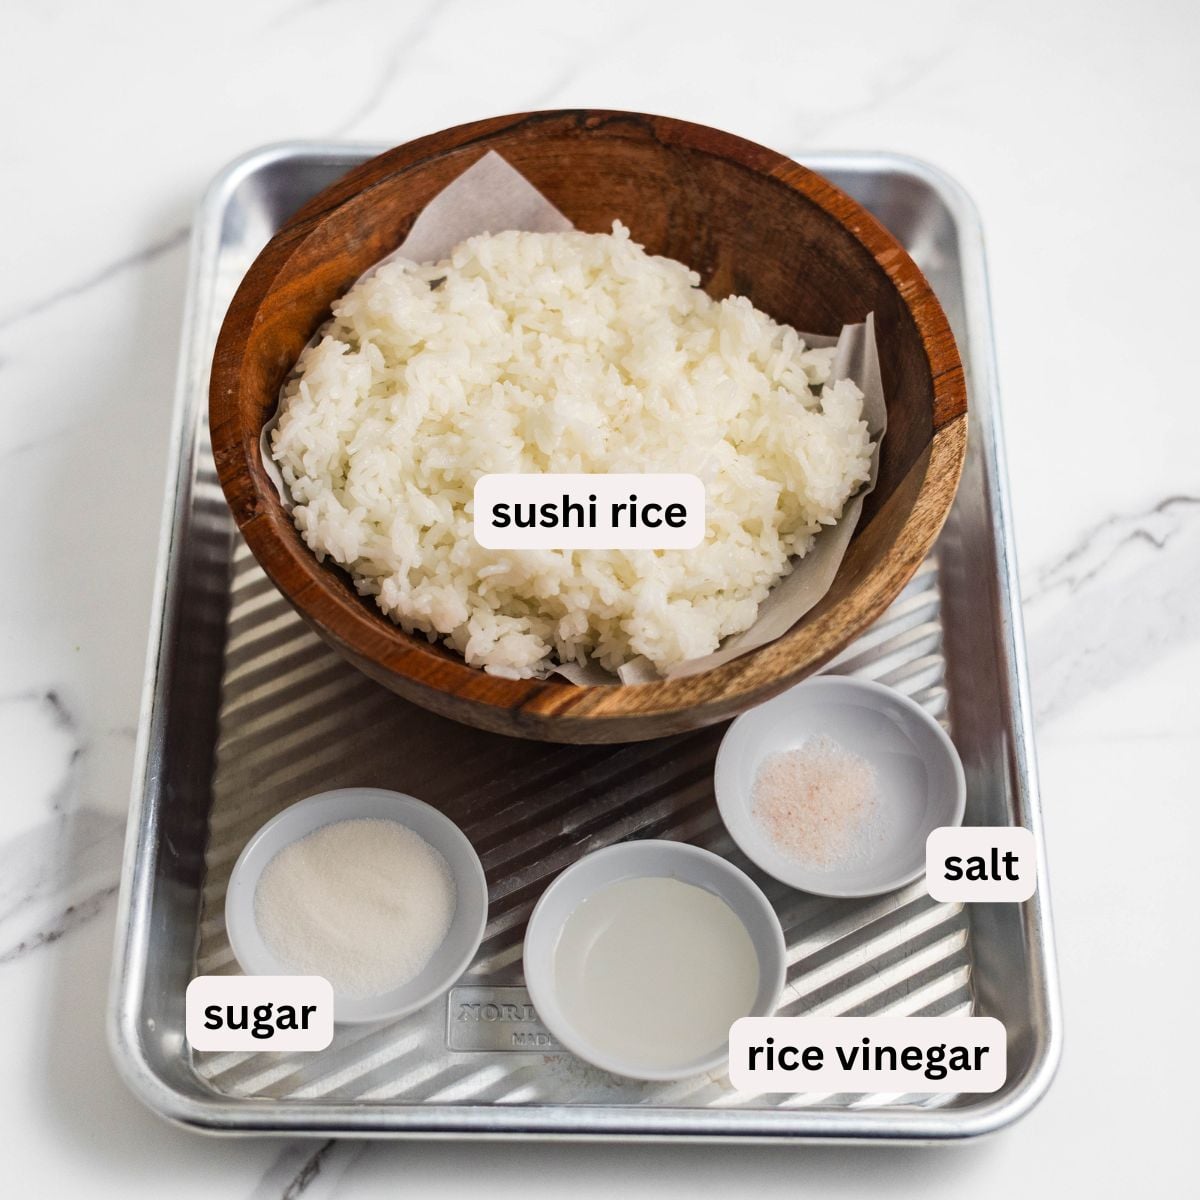
- Sushi rice is the right call here, short-grain, sticky, and sturdy enough to hold its shape when you scoop it onto seaweed. Jasmine rice works in a pinch but the texture is looser. Cook it slightly on the drier side if you can; wet rice turns gummy under the tuna layer.
- Rice vinegar, sugar, and salt are the classic sushi rice seasoning. Season the rice while it's still warm so the vinegar and sugar absorb properly, cold rice won't take the seasoning the same way.
Tuna Topping
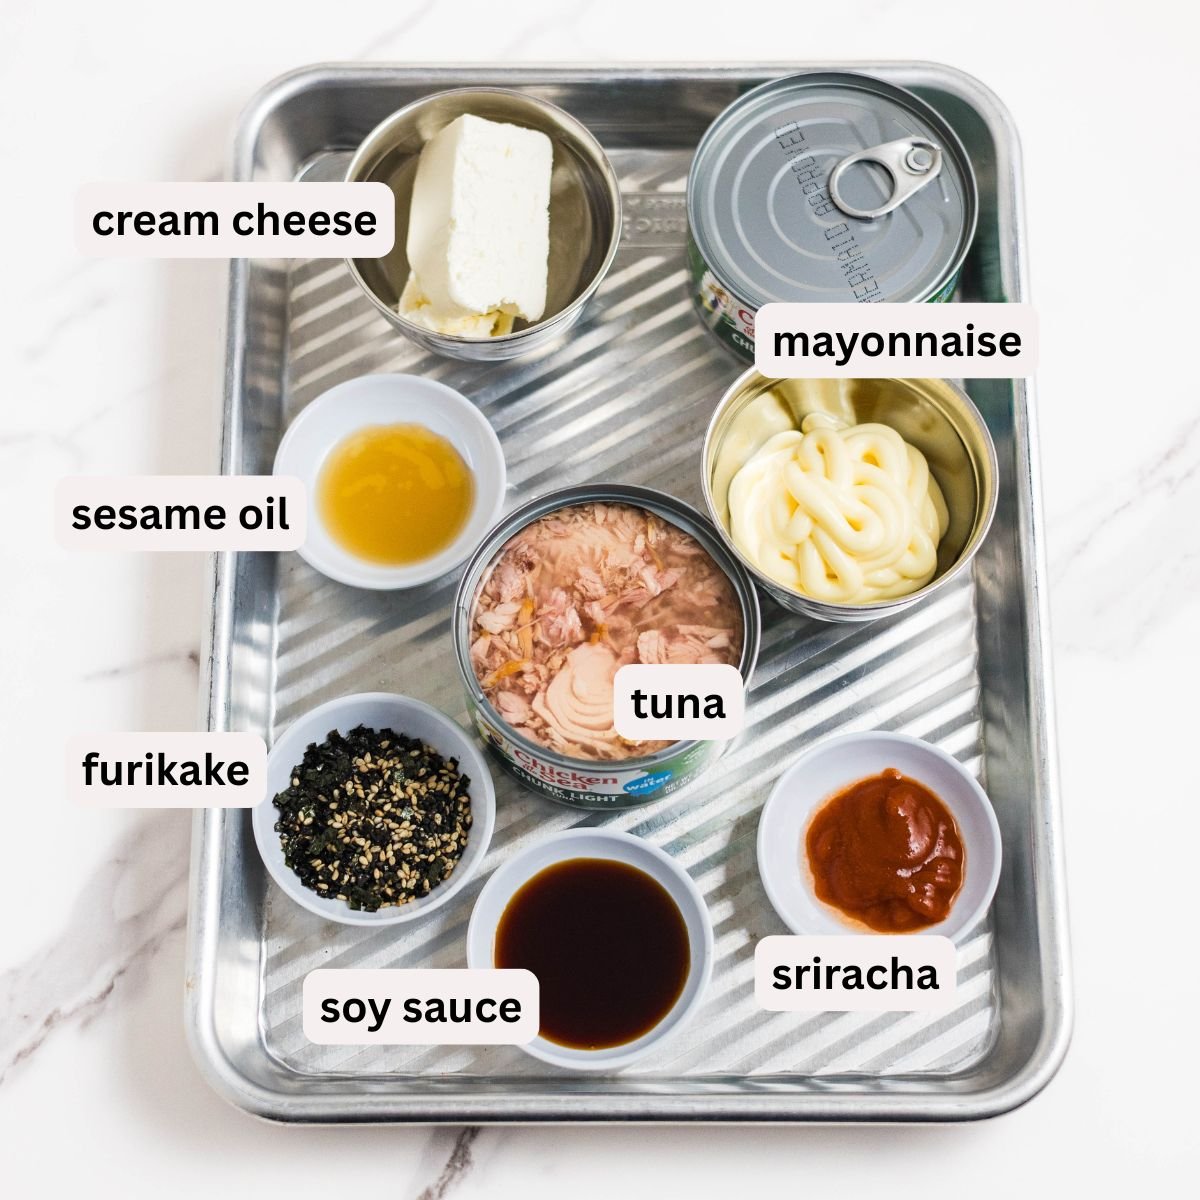
- Canned tuna - drain it well. Excess moisture from the can is the main reason sushi bakes turn watery. Pat it dry with a paper towel after draining if it still looks wet.
- Furikake - goes between the rice and the tuna topping. This middle layer is what gives you that distinct savory, sesame crunch in every bite. Use your favorite variety. The standard nori-sesame blend is great; the Kyo Rayu chili oil version from Japan is exceptional if you can find it.
- Kewpie Japanese mayonnaise is creamier and slightly sweeter than regular mayo, and it's worth using the real thing here. It's available at most Asian grocery stores and increasingly at regular supermarkets too.
- Sriracha provides the heat. Start with the recipe amount and taste before spreading, you can always add more but you can't take it back.
- Cream cheese (softened) gives the topping that rich, baked cheesecake-like quality that makes sushi bake so craveable. Let it come to room temperature before mixing so it blends smoothly without lumps.
- Soy sauce and sesame oil add the umami depth that makes this taste like sushi and not just tuna casserole.
- Green onions add freshness and color throughout the topping.
Optional Toppings
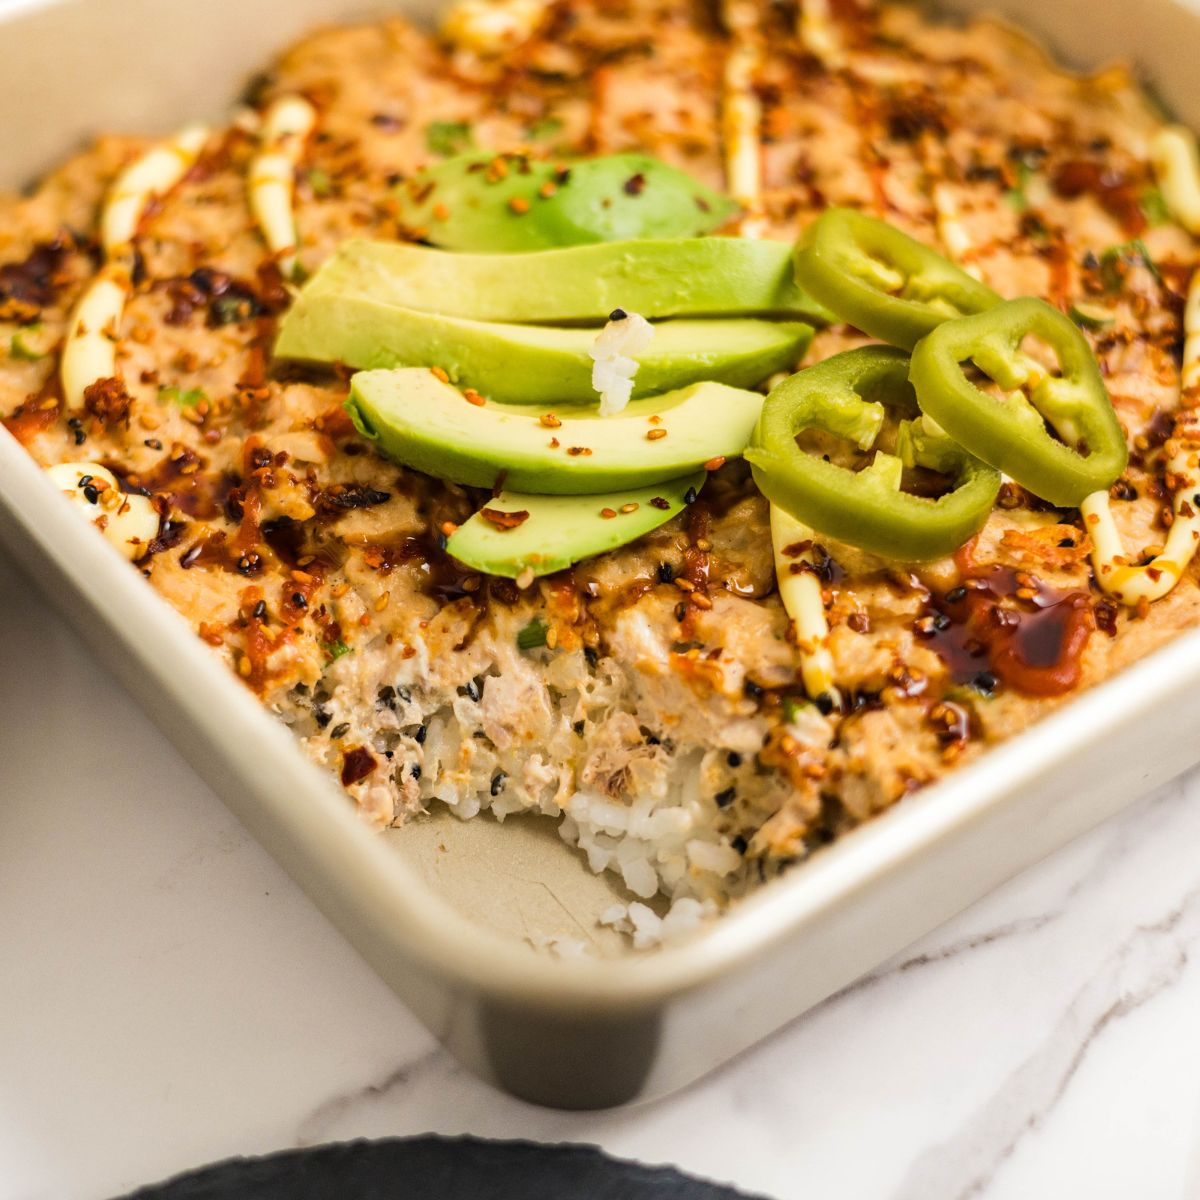
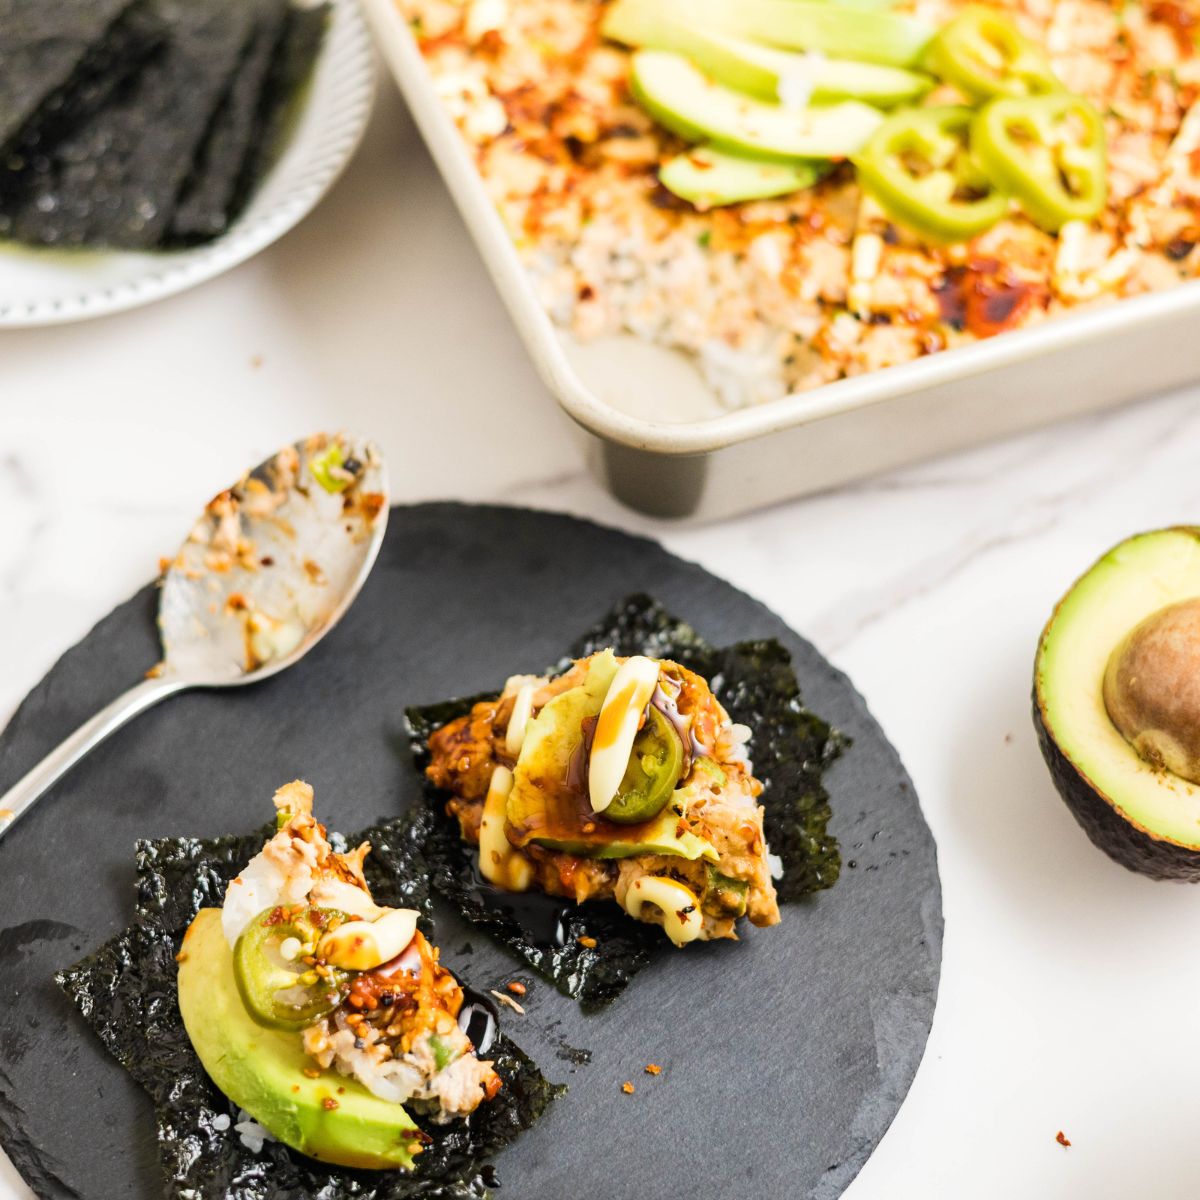
Eel sauce, sriracha mayo, extra furikake, pickled jalapeños, sliced avocado, cucumber- add after baking. Seaweed sheets for serving are not optional in my house.
Step-by-Step Instructions
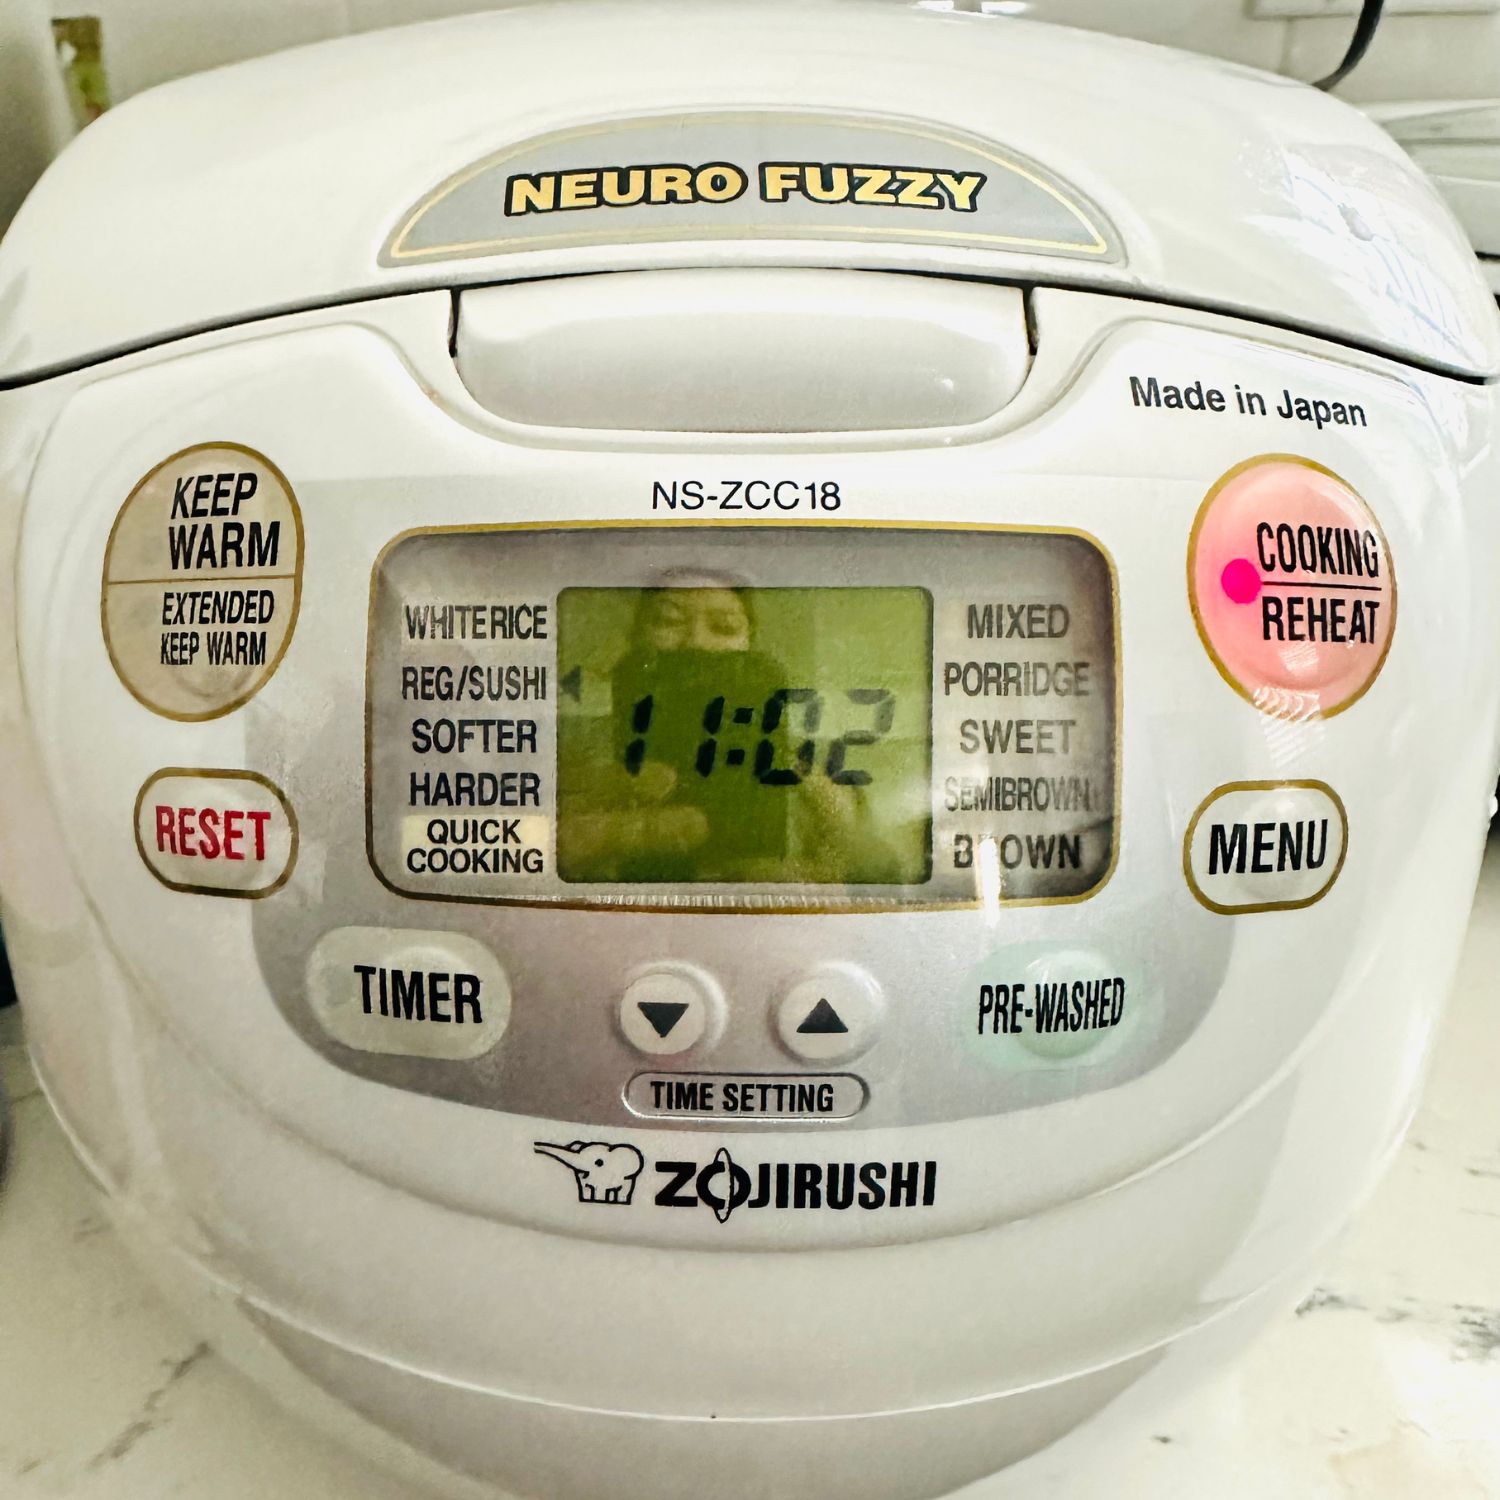
- Make the rice: Cook sushi rice and let it cool slightly.

- Season the rice: Stir in rice vinegar, sugar, and salt. Mix gently so it stays fluffy.

- Layer: Spread the rice in a baking dish and sprinkle furikake over the top.
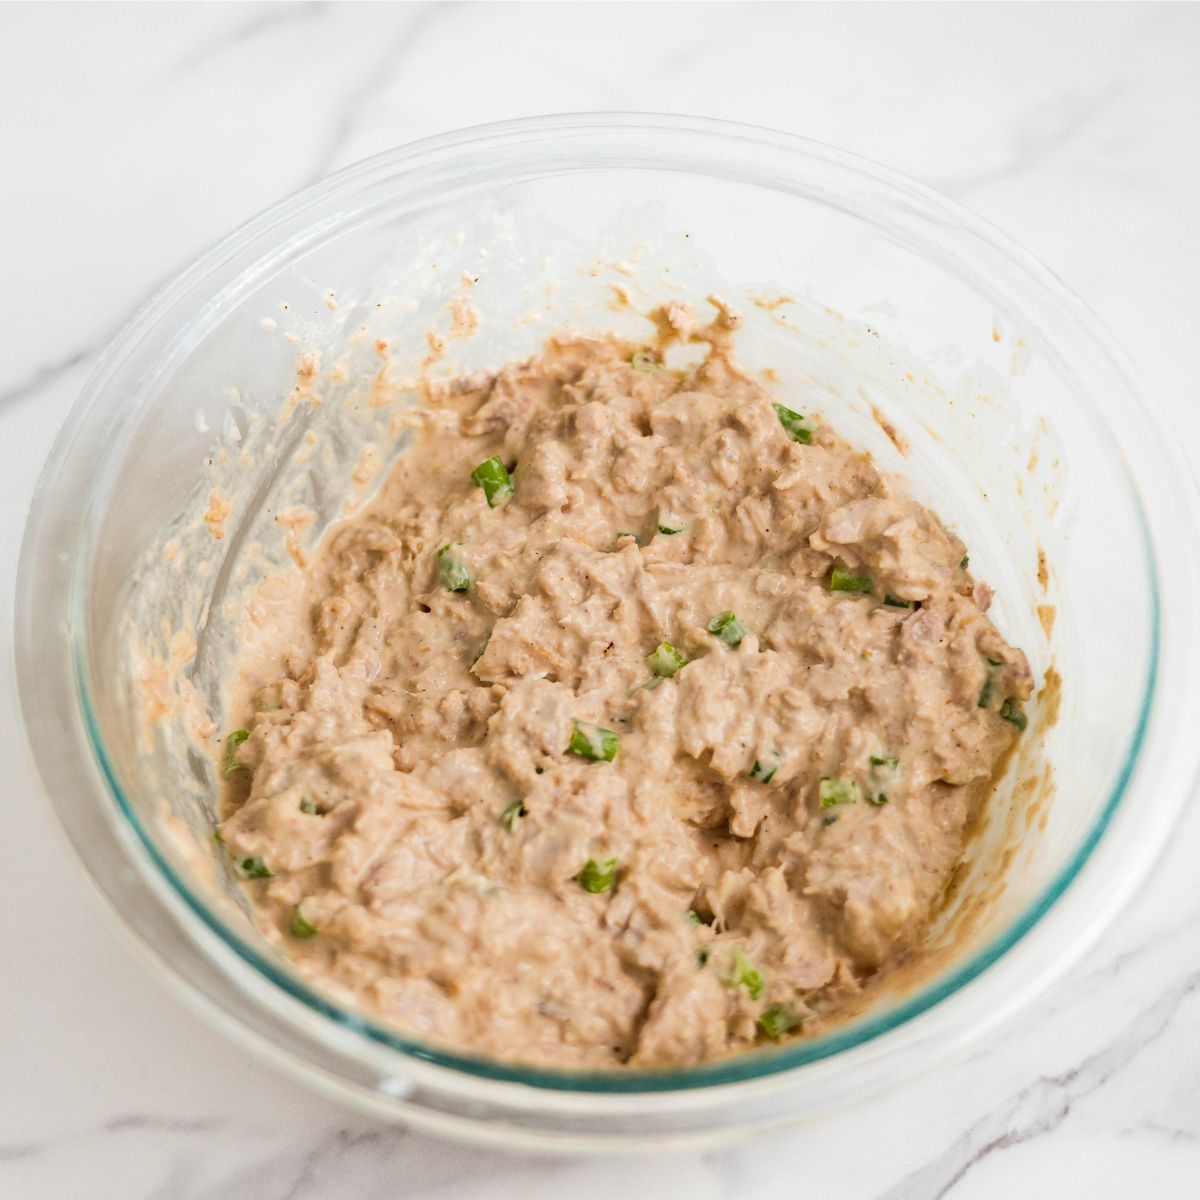
- Mix the topping: In a bowl, combine canned tuna, Kewpie mayo, sriracha, sesame oil, soy sauce, cream cheese, and green onions.
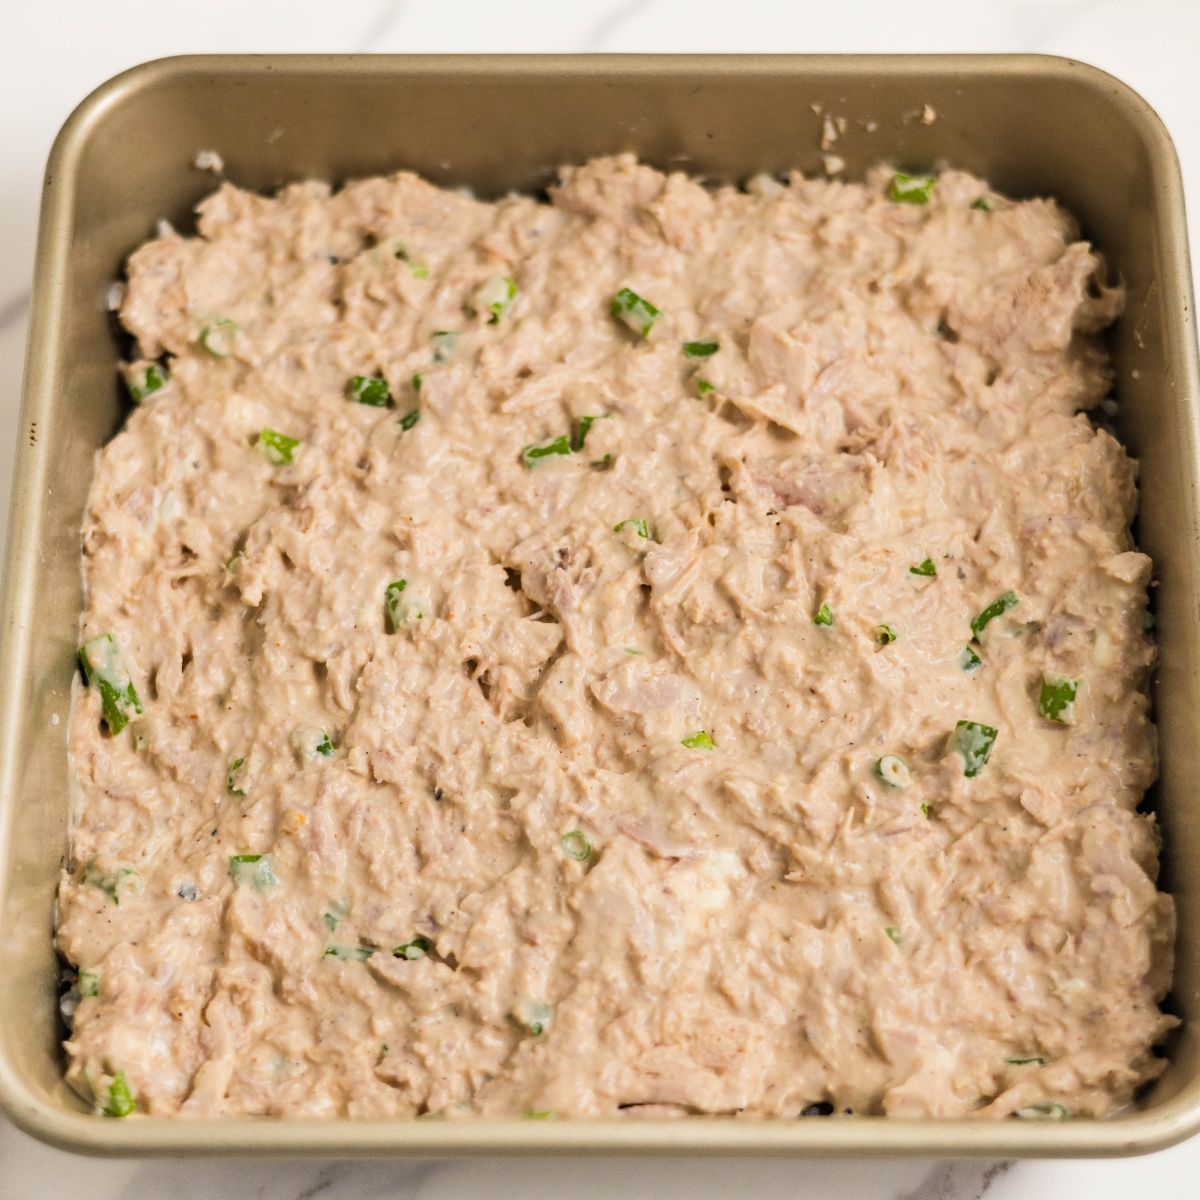
- Spread: Smooth the tuna mixture over the rice.

- Bake: Roast at 400°F for 10 minutes, until warm and lightly bubbly.
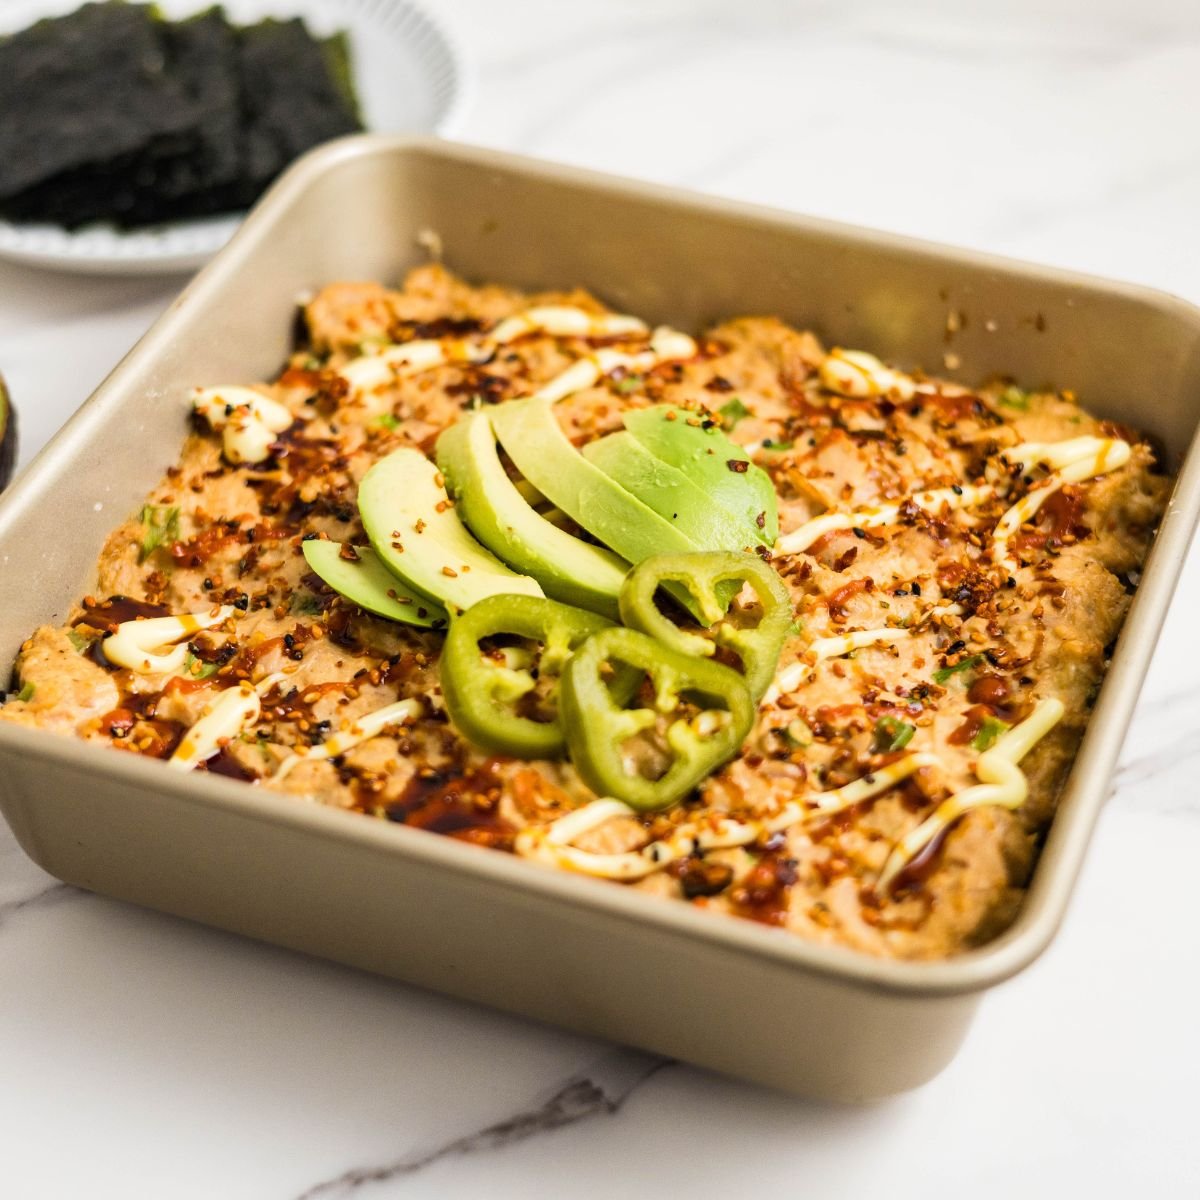
- Finish: Drizzle with eel sauce or sriracha mayo. Add more furikake, pickled jalapeños, or green onions.
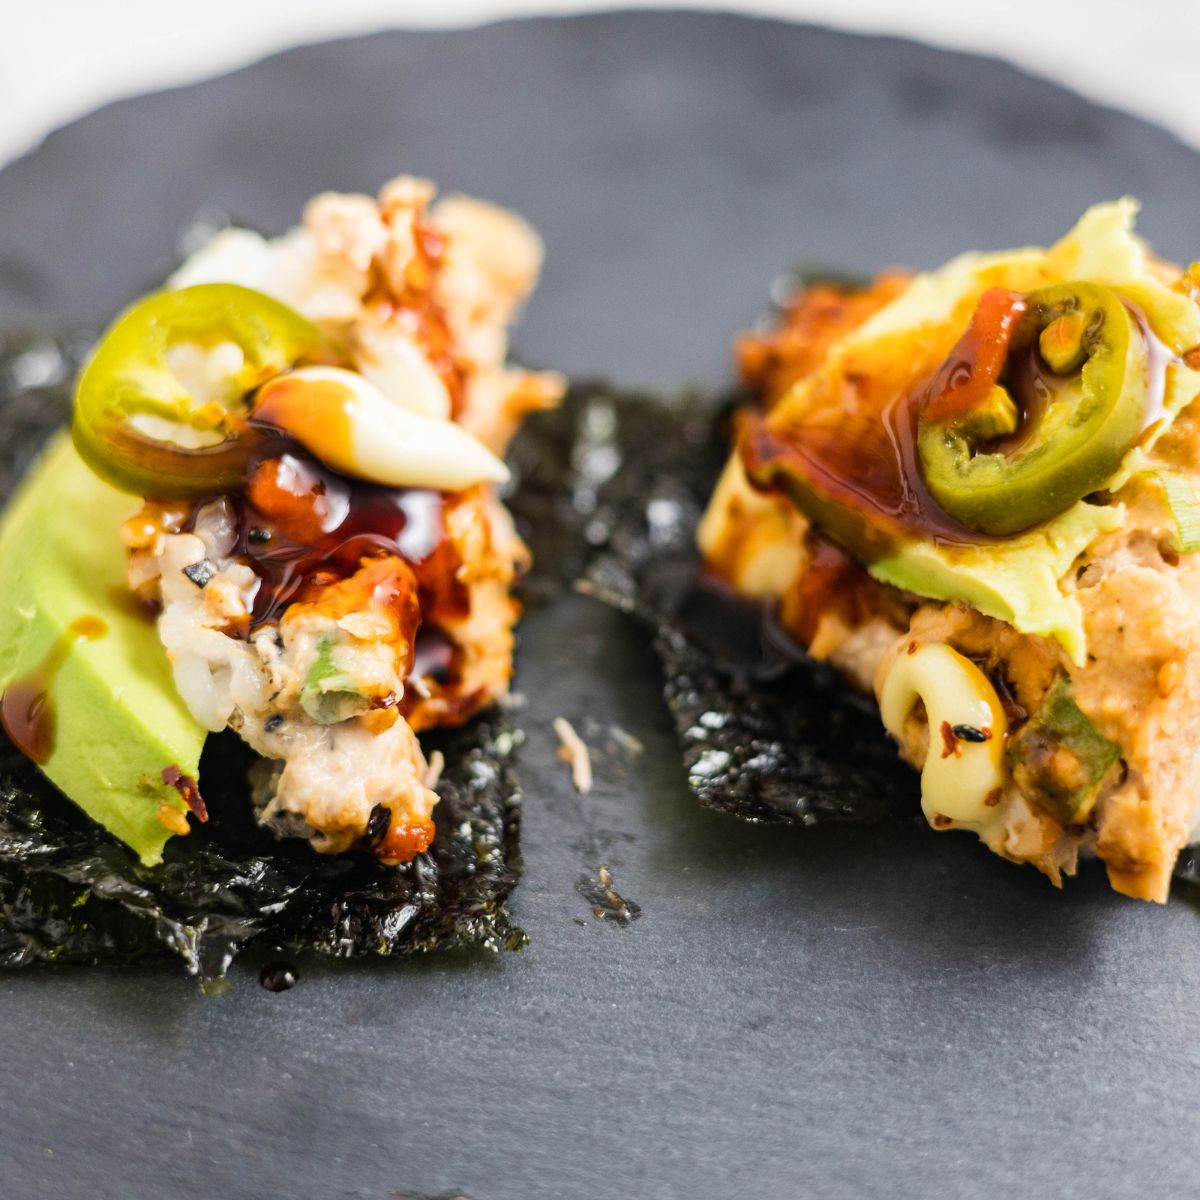
- Serve: Scoop with toasted seaweed sheets. Try not to eat the whole thing yourself.
Meal Prep & Time-Savers
- Make the rice the night before — store it covered in the fridge and let it come to room temperature or warm slightly before layering, so it spreads easily without tearing.
- Mix the tuna topping up to 2–3 days ahead and store covered in the fridge. Assemble in the pan in the morning and bake just before serving.
- For a potluck, assemble fully at home, cover with foil, and bake on arrival. Sushi bake travels well unbaked — just keep the topping and rice separate if you need more than a couple of hours of travel time.
Variations
- Half tuna, half crab - split the pan down the middle with two different toppings for a "choose your fighter" situation at the table. Crowd pleaser at every gathering.
- Swap the protein - canned salmon works exactly the same way as canned tuna and gives a richer, slightly fattier result. Imitation crab (kani) is the most classic sushi bake filling if you want to go that route.
- Add gochujang - swap some of the sriracha for gochujang for a deeper, slightly sweet heat instead of the sharp vinegary heat of sriracha.
- After-bake additions - cucumber, mango, and avocado all work beautifully as fresh additions after the bake comes out of the oven. Mango is very Filipino and very good here.
- Mini potluck portions - bake in a muffin tin for individual single-serve portions. Reduce bake time to about 7 minutes.

How to Store Leftovers
Sushi bake is best eaten the same day, the rice firms up significantly as it chills in the fridge and doesn't reheat to the same soft, sticky texture it had fresh. That said, leftovers keep in an airtight container in the fridge for up to 2 days.
To reheat: microwave covered with a damp paper towel on medium power, or warm in a 300°F oven for 8–10 minutes covered with foil. The damp paper towel method is more reliable for keeping the rice from drying out completely.
Rose's Tips
- Cook the rice the Filipino way. Rinse the rice, level it in the pot, then place your fingertip lightly on top. Add water until it reaches the first line of your finger. For a measured guide, use about 1 to 1¼ cups of water for every cup of white rice.
- Season the rice while it's warm. Cold rice won't absorb the vinegar and sugar properly. Season it within 5 minutes of cooking, fold gently, and let it cool slightly before pressing into the pan.
- Press the rice gently, not hard. You want a compact layer that holds together when scooped, not a dense compressed brick. Use damp hands or the back of a spoon and just pat it down lightly.
- Don't skip the furikake between the layers. Most people only put furikake on top. The middle layer — between the rice and the tuna — is what gives you crunch and flavor in every single bite, not just on the surface.
- Drain the tuna well. Excess moisture from the can is the main cause of a watery sushi bake. Drain thoroughly and pat dry with a paper towel if it still looks wet.
- Taste the tuna mixture before spreading. You can adjust sriracha, soy sauce, and sesame oil at this stage. Once it's baked you can't fix it.
- Choose the right baking pan. Use an 8×8 or 9×9-inch pan for one batch. An 8×8 pan gives you thicker layers, while a 9×9 makes them slightly thinner. If doubling the recipe, use a 9×13-inch pan.
- If using a Pyrex dish: Make sure the oven is fully preheated before adding the dish. Do not place Pyrex under the broiler. For a more golden top, bake it for an extra 2–3 minutes or use a metal pan if you plan to broil.
- Broil for the last 1–2 minutes if using a metal pan. This gives the top a golden, slightly caramelized finish. If using a Pyrex or glass baking dish, skip the broiler and bake for an extra 2–3 minutes instead.
- Rest before scooping. Five to ten minutes out of the oven lets the layers settle. Scooping immediately means everything slides around and you get rice without topping or topping without rice.
Recipe FAQs
Yes -sushi bake is credited to the Filipino community in Hawaii, created around 2015 and popularized as a potluck dish before going viral during the pandemic. It's a Filipino-American invention inspired by Japanese sushi flavors, and it remains especially popular in Filipino households across the US, Hawaii, and the Philippines.
Almost always the tuna. Canned tuna holds a lot of moisture — drain it thoroughly and pat it dry before mixing. Also make sure you're baking uncovered so excess moisture can evaporate. Let the finished bake rest 5–10 minutes before scooping; this also helps the layers tighten up.
Any canned tuna works — chunk light, solid white albacore, or tuna packed in oil (drain well). Oil-packed tuna is slightly richer. Tuna in water is what Rose uses here and it works perfectly with the Kewpie and cream cheese providing the richness.
Make a quick substitute by combining toasted sesame seeds, crumbled roasted nori, a pinch of salt, and a tiny pinch of sugar. It won't be identical but it gives you the toasted sesame-seaweed flavor that furikake provides. Most Asian grocery stores and many regular supermarkets carry furikake now.
Yes — the tuna topping can be made 2–3 days ahead. The rice can be made the night before. Assemble and bake just before serving for the best texture. Fully assembled and baked sushi bake doesn't reheat as well, so if you're making it for a gathering, bring it unbaked and bake on arrival.
Glass or ceramic retains heat well and keeps the sushi bake warm longer at the table — ideal for potlucks where it will sit out. A standard 8x8 or 9x13 metal pan works too; just note that metal pans may bake slightly faster.
Set the pan in the center of the table with a big spoon and a pile of seaweed sheets. Everyone scoops their own portion onto a piece of seaweed and folds it up to eat. Add all your topping options — eel sauce, sriracha mayo, sliced avocado, pickled jalapeños — in small bowls on the side. It's interactive and it always gets demolished.
More Asian and Filipino Favorites


Did you try this recipe?
Share how it turned out in the comment box below, and if you loved it, share it on Facebook, Pinterest & Instagram.
Thank you!


Easy Spicy Tuna Sushi Bake
Equipment
- 1 8½ x 8½ baking pan
Ingredients
Rice Base
- 2 ½ cups cooked sushi rice
- 2 tablespoon rice vinegar
- 1 tablespoon sugar
- ½ teaspoon salt
Tuna Topping
- 2 can tuna drained
- ¼ cup Kewpie mayonnaise
- 1 tablespoon sriracha
- 2 tablespoon cream cheese softened
- 1 teaspoon sesame oil
- 1 teaspoon soy sauce
- ¼ cup chopped green onions
- 2 tablespoon furikake plus more for topping
Optional Toppings
- Extra mayo or sriracha mayo
- Eel sauce
- More furikake
- Pickled jalapeños
- Seaweed sheets
Instructions
- Preheat oven to 400°F.
- In a bowl, combine cooked sushi rice, rice vinegar, sugar, and salt. Mix gently.2 ½ cups cooked sushi rice, 2 tablespoon rice vinegar, 1 tablespoon sugar, ½ teaspoon salt
- Press the rice into an 8×8 or similar baking dish. Sprinkle with furikake.2 tablespoon furikake
- In another bowl, mix tuna, Kewpie mayo, sriracha, cream cheese, sesame oil, soy sauce, and green onions.2 can tuna, ¼ cup Kewpie mayonnaise, 1 tablespoon sriracha, 2 tablespoon cream cheese, 1 teaspoon sesame oil, 1 teaspoon soy sauce, ¼ cup chopped green onions
- Spread tuna mixture evenly over the rice.
- Bake 10 minutes, until warm and slightly golden.
- Drizzle with eel sauce or sriracha mayo, add more toppings as desired.Extra mayo or sriracha mayo, Eel sauce, More furikake, Pickled jalapeños
- Serve with seaweed sheets.Seaweed sheets
Save This Recipe 💌
Notes
- Season the rice while it’s still warm so it absorbs the vinegar mixture properly.
- Press the rice gently into the pan. You want it compact, not packed too hard.
- Add furikake between the layers, not just on top, so every bite has more flavor and crunch.
- Drain the tuna really well to keep the sushi bake from turning watery.
- Taste the tuna mixture before spreading and adjust the sriracha, soy sauce, or sesame oil as needed.
- Broil the top for 1 to 2 minutes at the end if you want a more golden, slightly caramelized finish.
- Let it rest for 5 to 10 minutes before scooping so the layers can set.
- You can also make this with salmon or crab.
- Store leftovers in the fridge for 2 to 3 days and reheat covered so it stays moist.


Rose Sioson says
I tried this spicy tuna sushi bake tonight and it turned out so good. Super easy to put together and the flavors were spot on — creamy, a little spicy, and perfect with the crispy seaweed.